|
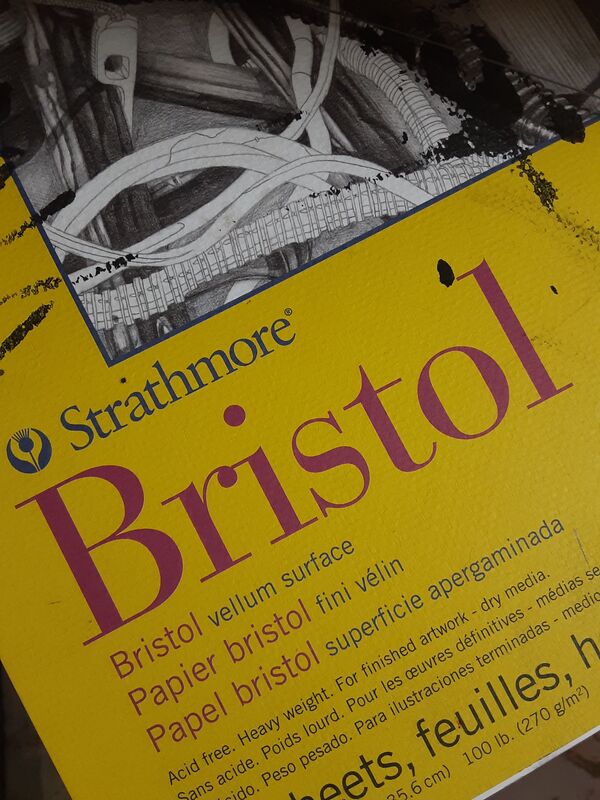
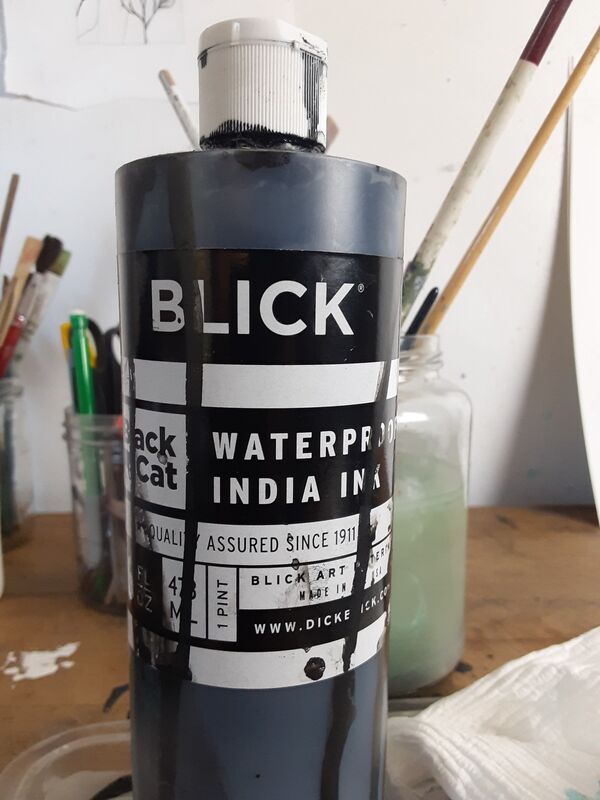
The most frequent question I get from other artists is: "How do you create those gouche & ink drawings?!"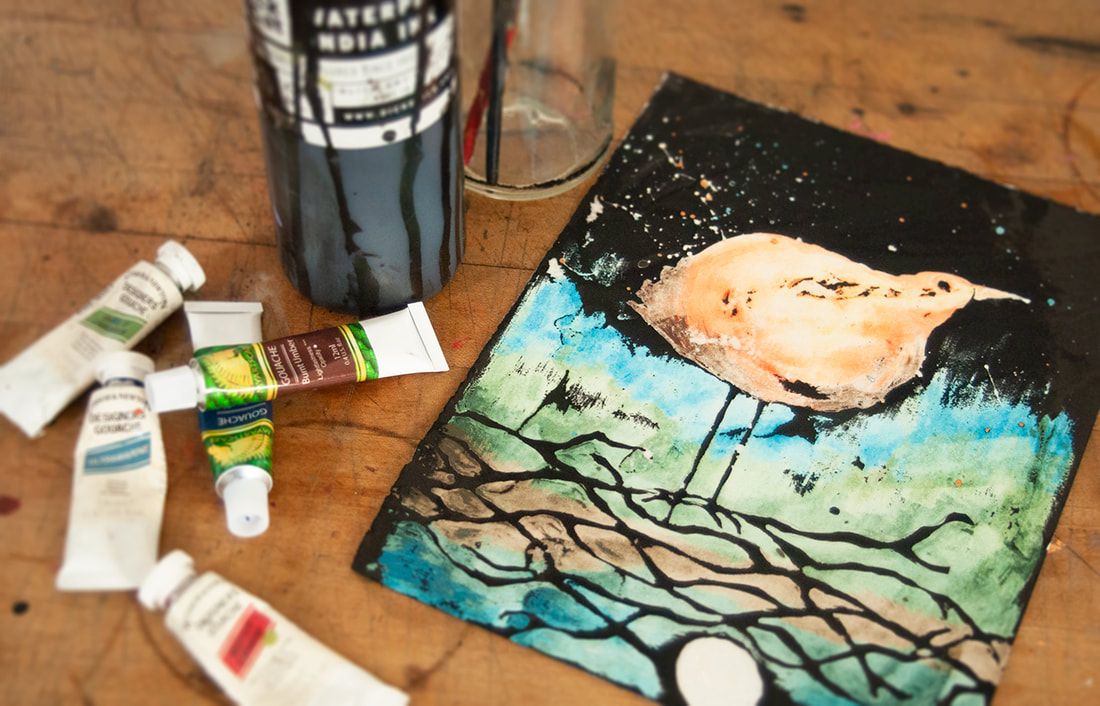 A friend of mine taught me how to do this technique somewhere in the early 90's, and I haven't necessarily gnawed at it or perfected it, but a couple times of year I pull it out to satisfy my soul...because the best part of it is the reveal! You can never be sure of your results until you wash it out, and I've had some bad results as well as REALLY stunning outcomes...but overall I dig the "Christmas morning" vibe of the whole surprise. The more I use this technique, the more I feel I can control the outcome for the better. You will need just a few things to make your own gouche & ink wash-out drawings and maybe you have some of these things on hand already! • Heavy-weight paper the paper you use has to be able to both take the paint and ink and take a beating under a water spray - heavy weight watercolor papers work well, I prefer Strathmore Bristol vellum because of it's ability to take some abuse, plus this versatile paper is available in a lot of unusual places and very affordable, I purchased an 11"x14" pad of 20 pages for under $10 at Ocean State Job Lot in Sanford, Maine. • Gouche you can use a really nice brand for the best results, but keep in mind that you will need a thicker coat and most of your paint will be washed away, I can't bring myself to wash expensive brands down the drain, so I bought myartscape brand set on Amazon for under $13.00. I tried an even cheaper student brand once and I'm pretty sure it wasn't even gouche I was using... and the colors didn't take to the paper at all...keep in mind, the better the paint quality, the better the results you will have with color. • Waterproof India Ink you will need waterproof India ink, this is the crucial component that can't be substituted, and you will need a good amount of it to cover your page. Dick Blick offers a great and affordable pint: Black Cat Waterproof India ink • Paint brushes & water of course, you will also need paint brushes and a water source to complete this technique. I use a small acrylic brush to apply the gouche and a big super thirsty soft brush to apply the ink. A faucet or a sink with a sprayer will work just fine for your wash out STEP 1 - PLAN YOUR DRAWINGNOTE: remember: the gouche will stain the paper and repel the ink When you are getting ready to create an image, understand that anything you don't paint with the gouche will end up black. The gouche will stain the paper with color and repel the ink, so it's best to plan your drawing a bit ahead of time to figure out where you will want the deep black to show, and where your colors will land. I'm not much of a "planner" when it comes to art, I like the experimental factor and surprise results, so I recommend to keep it simple to start in case it doesn't work out. You can even do small sketches to test the process! 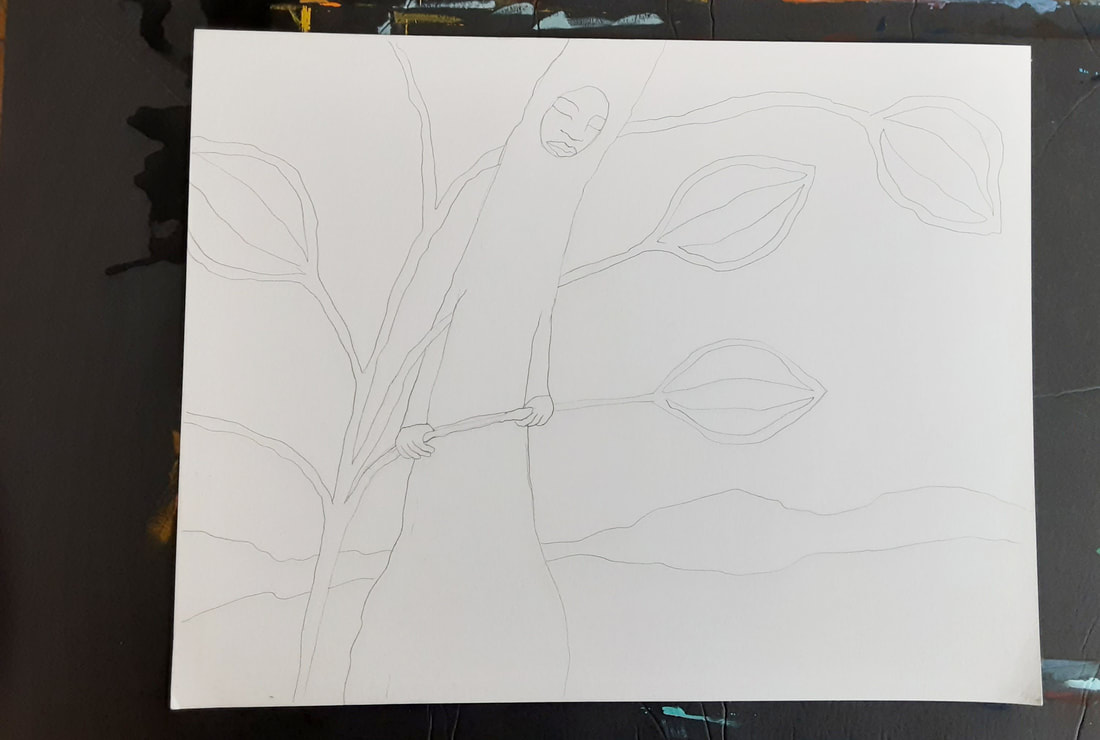 STEP 2 - ADD THE GOUCHENOTE: The thicker the paint, the less ink will get through to the paper When you apply the gouche, and you leave paper untouched where you want the black to show, be sure and be generous where you want the color to be strong. Lay the paint on as thick as you want! brush strokes that go thick to thin come out fantastic as the black will pick up the details in the brush strokes where it thins out. The image you are creating with just the gouche phase won't look awesome as it is, the magic comes after the ink is washed off STEP 3 - LET IT DRY! LET IT DRY!NOTE: LET IT FULLY DRY! One of the most important steps in this process is your patience. Let the gouche fully dry before anymore steps...if you don't, the ink will smear the gouche and make weird inky mud spots 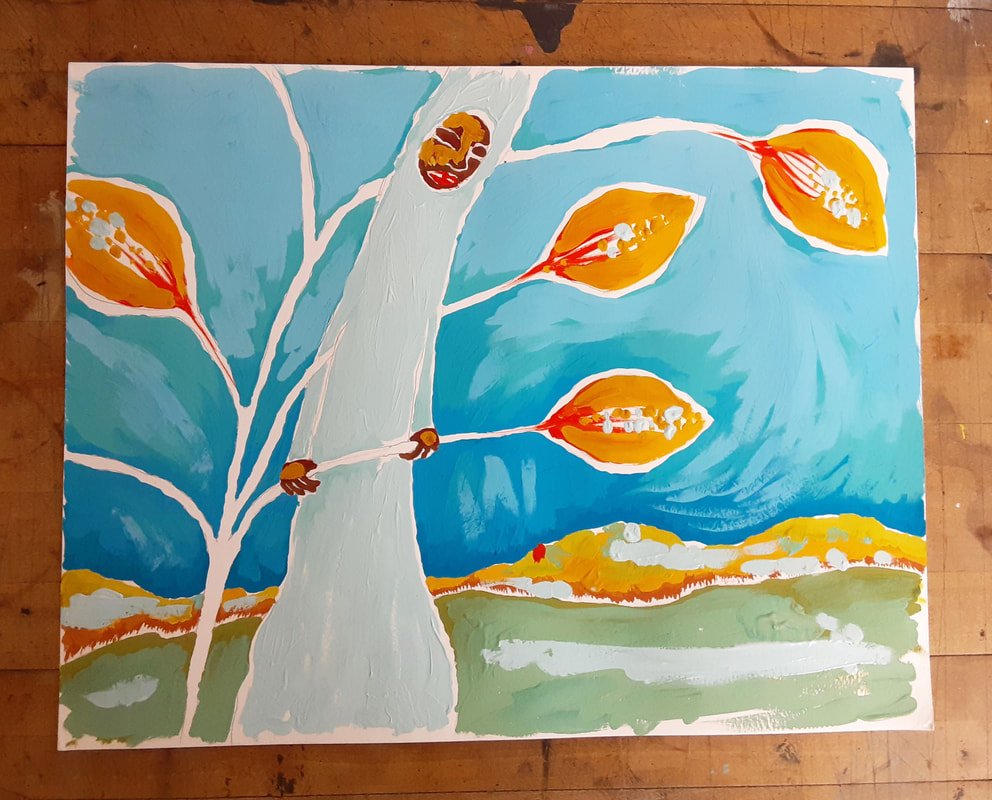 STEP 4 - ADD THE WATERPROOF INDIA INKNOTE: DO NOT BRUSH THE INK ON TWICE... DO NOT GO OVER YOUR STROKES! ONE THICK HEAVY COAT OF INK - DO NOT RE-BRUSH! The best results come if you "pour" the ink over the in one quick step using a dump bin...but I've never been willing to A: Waste that much ink or B: Make a huge mess that requires additional clean up time. So for me, I pour the ink into a cup and a use a soft, thick and thirsty brush that holds a lot of ink and I just brush it on quickly in large single strokes. Some of your ink strokes may show if you are slow. You do have to do this quickly and confidently because once the ink starts to sit on the gouche it can re-wet the gouche and you can smear the colors. I personally like the effects of the flaws, but if you are more of a perfectionist, a quick pour has cleaner results. STEP 5 - LET IT DRY! LET IT DRY!!!NOTE: VERY IMPORTANT to let the ink FULLY dry before the next step! The waterproof India ink will take longer to dry than your gouche. The ONLY way this process will work is when you let the ink FULLY dry before the next step! I've tested a few pieces that had wet ink and it REALLY didn't work out too well...so now, just sing this version from Frozen.... "Let it Dry! Let it dryyyyy" for a several hours or even more depending on how thick your ink is. I like to leave mine overnight so I can wake up and unwrap the magic in the morning. and now . . . THE BEST PART |


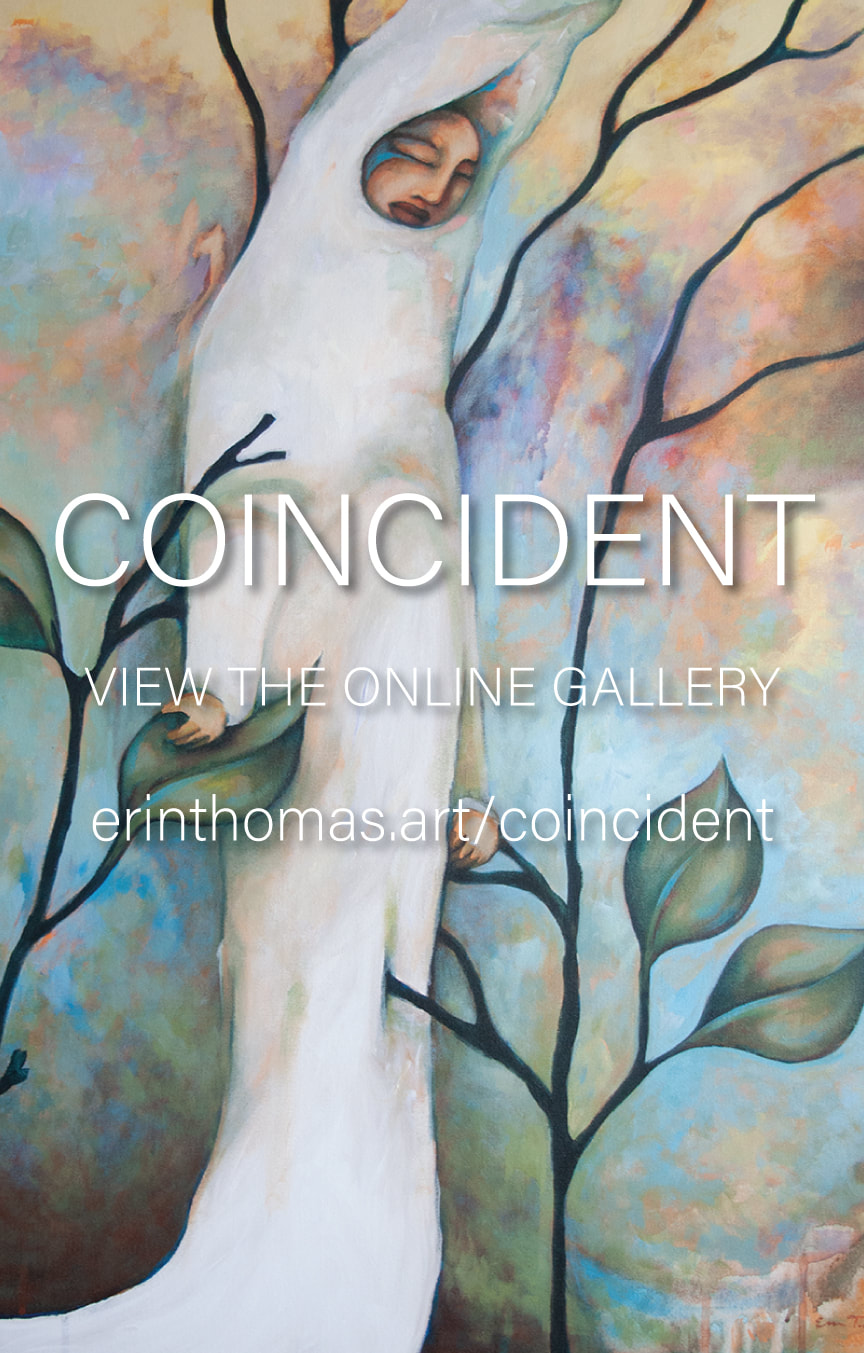
be sure and visit my November Gallery "Coincident" | 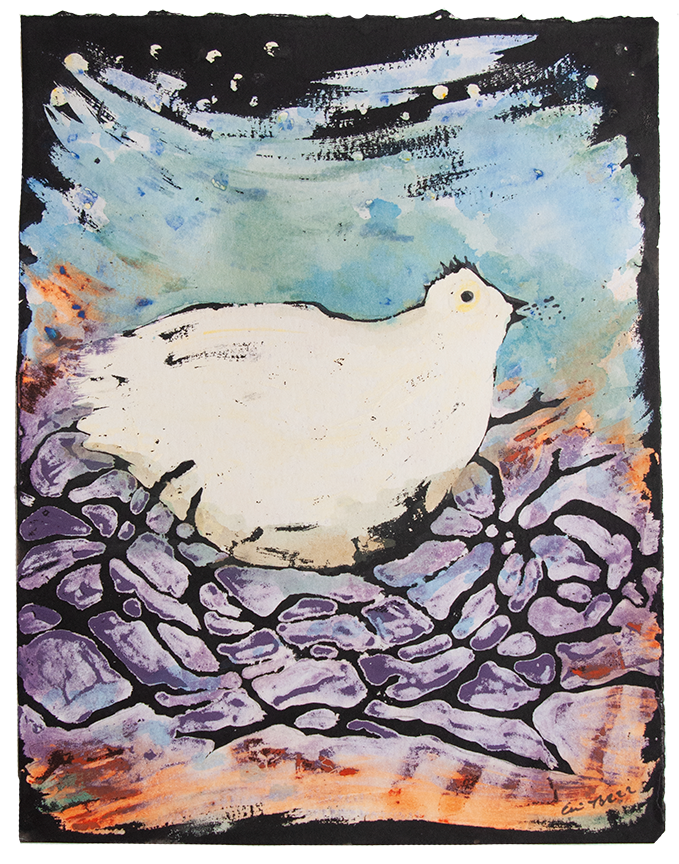 |
I would love to see what you can do!
checkout the quick video tutorial below to review the process
so be sure and stop by my social pages and share your finished images!
ERIN THOMAS ART on FACEBOOK
ERIN THOMAS ART on INSTAGRAM
Hi Erin! I love your Gouche tutorial!
XO
Cousin B
Leave a Reply.
& Notes
Erin Thomas
Excerpts from:
Ask Me About My Art / 2020
Where does your inspiration come from?
"Everywhere! That's a bit of a tough question because inspiration is fluid and constantly evolving and it changes minute to minute, hour by hour. I could be passionate about circles one day and trip over a rock and obsess about the color of that particular rock for a decade. It's a constant surprise for me, that's what makes life, and art... interesting and beautiful."
What is your creative process?
"Well, that might be an entire separate book! I guess the simple answer is that I dump the things that clutter my brain into art so I can make room to upload all the new things."
What medium do you primarily work in?
"Depends on the subject, the colors I am drawn to that day, the subject I'm looking at and whatever it is that is inspiring me at that moment...I use whatever tool necessary to best convey the story, image, or message. I do seem to have a comfort level with acrylic on canvas, written word or digital photography, I frequently lean on and return to those tools after trying a few other things."
Are there specific techniques that you use in your work?
"I suppose in a way, I have created my own techniques over the years, I do have some art school & materials training, but my goal with art has always been how to get what's in my head into a more firm or permanent reality... translating what I see when I close my eyes, I've always wondered what thoughts looked like and how color smells, I like to creatively name things and see all their angles... those things drive me. I've never really loved replicating reality or deep diving technical skills because the kind of art I'm after is more born from the rawness of coming straight from a thought to paper."
Erin Thomas is an artist living in Southern Maine
EMAIL ERIN THOMAS

Archives
July 2023
June 2023
January 2023
December 2022
October 2022
Categories
 RSS Feed